
DCC For Dummies
 At last I have my model railway running pretty well floorlessly! Carriages are negotiating curves, couplers staying connected at changes in gradient, locos performing well with sound at realistic speeds. Heck even my diamond crossover works well.
Naturally, this has been a rather long learning curve, considering I knew nothing when I started. Given I learned a few lessons the hard way, I thought it might be good to put down my thoughts on how to construct a layout and avoid all the weeks of pain I experienced.
Part 1 Laying Track
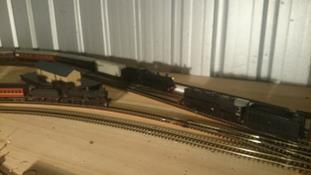
The laying of track for the most part is simple. First because of the tight space available, I decided to go with a minimum radius of 22″. I have a track gage to do this with and worked my way around corners. I soldered the flexi track together that was being used on curved sections of track to give a smooth curve. This worked a treat. I was careful to not have tight sections on the curves, although I found it impossible to do everything perfectly. When you transition between radii, or from curve to straight, it affects positioning of bogies and couplings, especially on long wheel based passenger carriages and 12 wheelers.
In the end, I worked out which combinations of rolling stock/locos derailed most frequently, and ran trains around and around at various speeds, noting how they negotiated the suspect sections. There was quite a bit of fowling of the hooks below the KD couplers on points and track pins, so I hammered the track pins to about 2 mm above the sleeper height. When couplers fouled on the points, usually where the point motor would be attached, I either bent the couplers up (final desperate act), or managed to realign the couplers so they are all the same height. I am still having trouble with the 60 class. The coupler on that engine is below most of the wagons and I am still figuring out the best solution.
On grades, there is a need to support the track for a gradual transition, otherwise couplers disconnect where grades start and stop, particularly with large loads. I have a 1 in 50 and my Eureka 38 comfortably handles a 7 car HUB set plus an FS or MHO van. My Austrains 35 after a few mods can haul a 6 car Brisbane Express plus TRC up the grade. I plan to get a couple more TRCs the Brisbane Express had up to three of these.
Part2 Power Feeds
Next I sectioned the track. What I learned is that the best way to do this is to run a feeder line around the layout and connect them via feeders to each section of track that is soldered together. I insulated every point rail that connects to a frog, and all legs of the diamond crossing to which I fitted a frog juicer to switch polarity as the trains moved over the crossing. This now works perfectly.
Where there is a loop, it is best to have insulating fishplates in the center somewhere as if a point is set in the wrong direction, the train shorts the track out shutting down power to the entire layout. With insulation, you can move one train into the loop while a train departs from another siding.
DCC Loco Programming
When setting up locos, do one at a time. Put one on the track, find it with your controller, and program it, making sure each loco uses a different channel. I found that using the long loco program with the engine number works very well. The setting up of DCC on the locos is somewhat complicated. Different decoders use different settings and it can drive you crazy. I have downloaded software, and very soon I will be connecting the laptop to start fine tuning. After my experience I recommend you splurge on sound as it is so much more fun.
I would set up the speed of each loco too, so they have a top speed that represents their class. For NSW that would be 70-75 mph for 36 and 38, 60 for a 32 or 35, and 50 for goods locos.
Summary.
- Solder long sections of curves before you lay the track.
- Apply power to every isolated section of track.
- Place an insulating fishplate on track leading from all point and crossing frogs.
- Try all combinations of locos and trains on curves before bedding down the rails.
- Set up 1 loco at a time for DCC.
- Split sections in passing loops to avoid short circuits.
- Get yourself a track cleaning car and run it over the whole layout every few months.
- Get locos with DCC sound or fit sound decoders.
- Don’t make anything permanent until you are sure it is all working smoothly.
- Make sure transitions of grades are very smooth.
I hope this basic guide will help you miss the pitfalls of setting up a DCC layout.
More soon.
John Gaydon
Related Posts


About The Author
admin
In his youth, John rode and photographed NSW steam from the age of 14. He has photos featured in numerous books, but perhaps his best work is in the two volumes of "Where There's Smoke". With a passion for steam, he hopes readers gain pleasure from some of his stories from long ago.
